
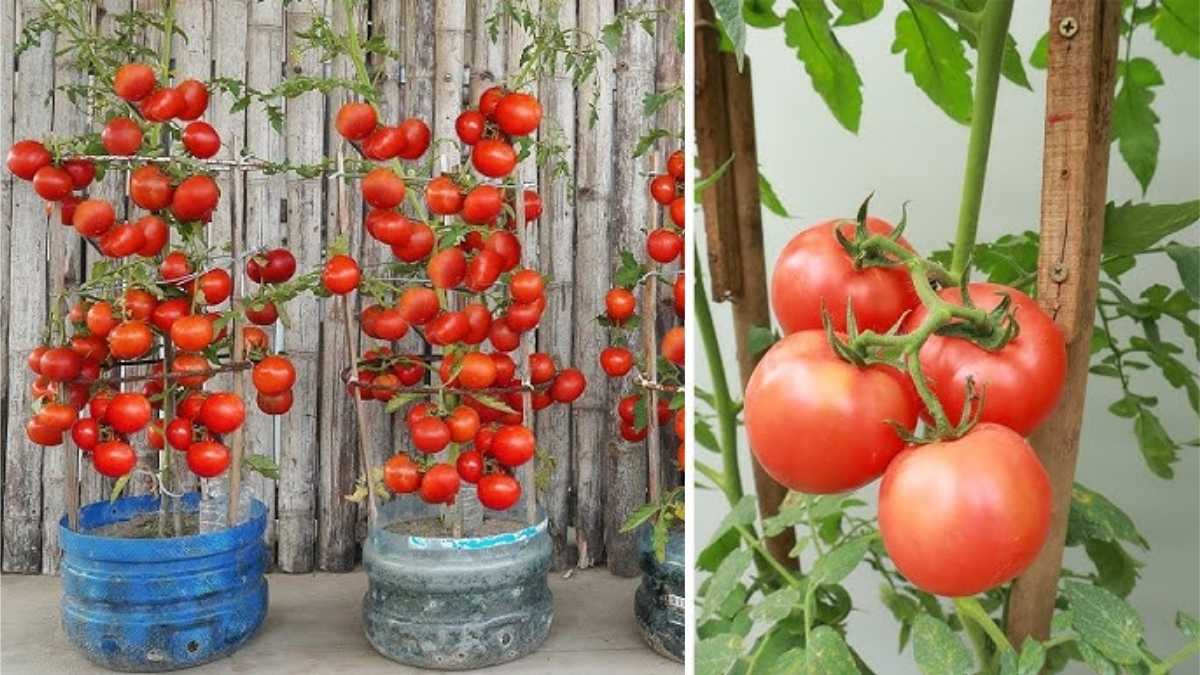
Growing your own cherry tomatoes at home is one of the most rewarding and sustainable gardening activities you can do. You don’t need a large yard, expensive planters, or even much gardening experience. With just a few recycled plastic bottles, some soil, and a bit of sunlight, you can grow sweet, juicy cherry tomatoes right in your home. This method not only provides you with fresh produce but also helps reduce plastic waste, making it an eco-friendly choice.
Why Grow Cherry Tomatoes in Recycled Bottles
Cherry tomatoes are small, flavorful, and easy to grow. They thrive in limited spaces and can adapt well to containers. Growing them in recycled bottles gives you the advantage of:
- Saving money by reusing waste materials
- Growing food in small spaces like balconies or windowsills
- Reducing plastic waste that would otherwise harm the environment
- Controlling the soil quality and avoiding harmful chemicals
- Ensuring a steady supply of fresh, homegrown tomatoes
This simple project is great for beginners, students, and even children learning about sustainability and gardening.
Choosing the Right Bottle

The first step is selecting a suitable bottle. You can use any clean plastic bottle, but 1.5 or 2-liter bottles are ideal for cherry tomato plants. These bottles are large enough to allow the roots to grow freely while being compact enough to fit in small spaces.
Keep in mind a few things when choosing bottles:
- Avoid bottles that previously contained harsh chemicals.
- Clear bottles are best because they allow sunlight to reach the soil.
- Wash the bottle thoroughly with warm water and soap.
- Remove the label to ensure maximum light exposure.
Once clean, decide how you’ll cut the bottle. You can either:
- Cut the bottle horizontally in half and use both parts, or
- Keep it upright and make small holes at the bottom for drainage.
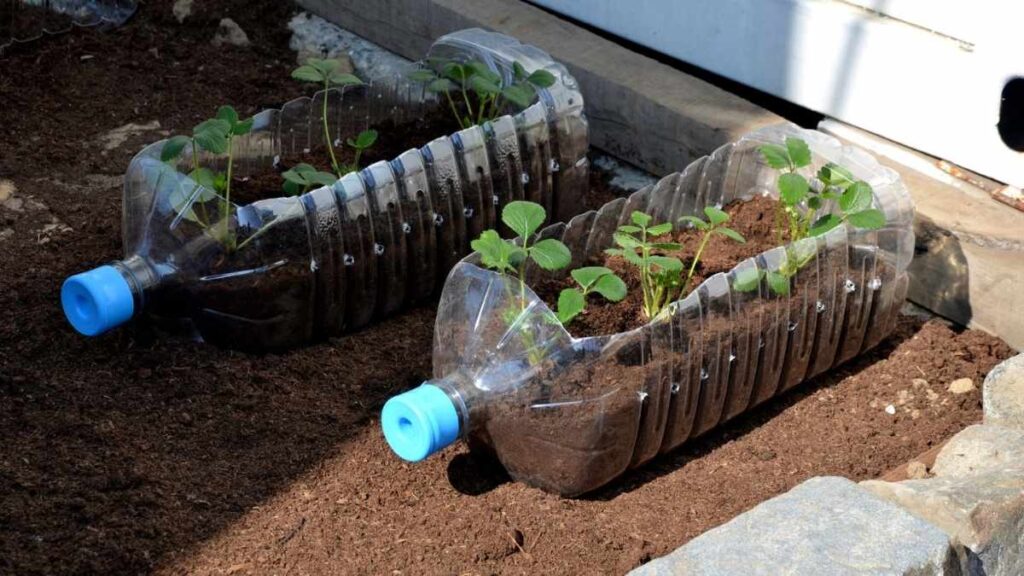
If you choose the horizontal method, the top part can serve as a funnel that fits into the bottom half, creating a self-watering system.
Preparing the Bottle Planter
Once you’ve chosen your bottle, it’s time to prepare it for planting.
If you’re using the self-watering method, make a small hole in the bottle cap. Invert the top half (with the cap on) and place it inside the bottom half of the bottle. The top portion will hold the soil, while the bottom acts as a water reservoir. This design ensures that the plant’s roots draw up water as needed, keeping the soil consistently moist without overwatering.
If you prefer the traditional method, simply keep the bottle upright and poke a few drainage holes at the bottom. Place small stones or pebbles in the base to prevent soil from blocking the holes.
Both methods work well, but the self-watering one is especially convenient if you have a busy schedule.

Making the Perfect Soil Mix
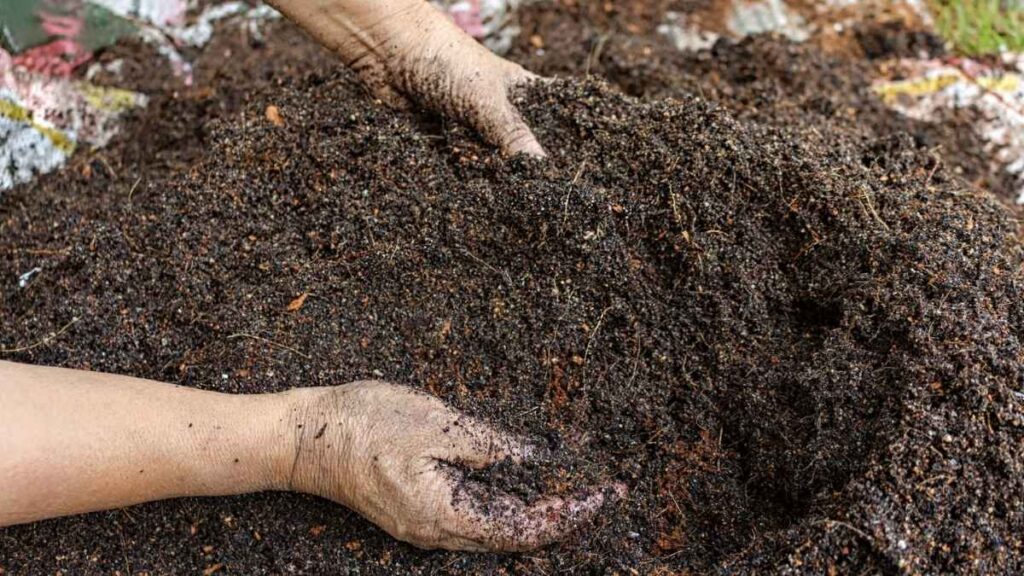
Cherry tomatoes love nutrient-rich, well-draining soil. The right mix will ensure your plants grow healthy and yield juicy fruits.
You can create an ideal soil mix using:
- 1 part garden soil
- 1 part compost or organic manure
- 1 part coco peat or sand
This mixture provides essential nutrients, retains moisture, and keeps the soil light and airy. If you don’t have compost, you can use kitchen waste compost or vermicompost. Avoid using heavy clay soil, as it retains too much water and can cause root rot.
Before adding the soil to the bottle, mix it thoroughly. Fill about three-quarters of the bottle with this soil mixture, leaving space at the top for watering.
Selecting and Planting the Seeds
Cherry tomato seeds are widely available at garden stores or online. You can also use seeds from a ripe tomato at home.
If you’re using tomato seeds from a fruit:
- Cut the tomato and scoop out the seeds.
- Rinse them gently in water to remove any pulp.
- Spread them on a tissue or plate and let them dry for a day or two.
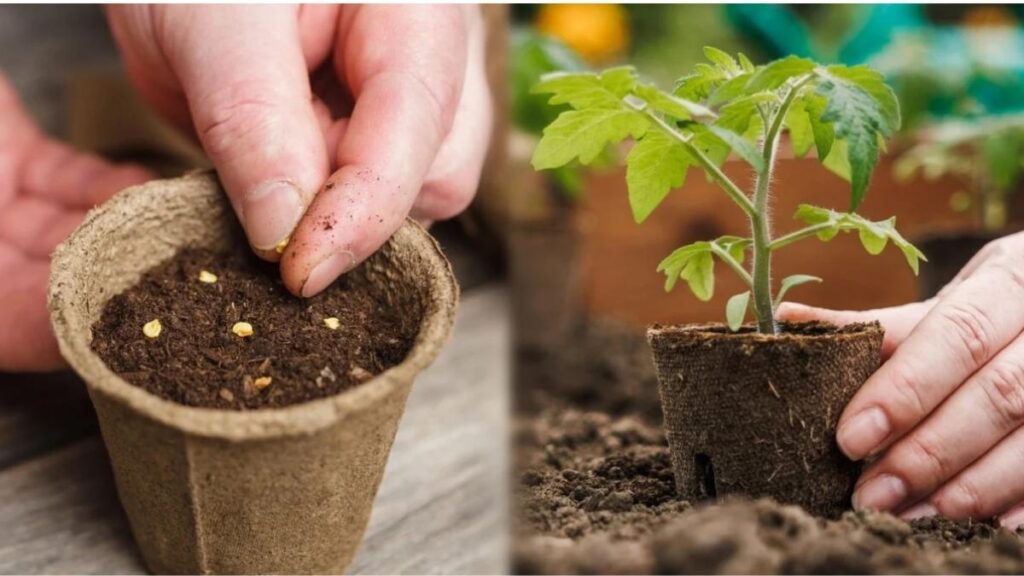
Once your seeds are ready:
- Plant two or three seeds in each bottle about half an inch deep.
- Lightly cover them with soil.
- Spray water gently to moisten the soil.
Place the bottle in a warm spot where it can get enough sunlight. Cherry tomato seeds usually germinate in 7–10 days. Once the seedlings appear, keep the soil moist but not soggy.
Providing Sunlight and Water
Sunlight is one of the most important factors in growing cherry tomatoes. These plants need plenty of light to grow strong and produce fruit.
Here’s how you can provide the right conditions:
- Place your bottles in a spot where they receive at least 6–8 hours of sunlight daily.
- If you don’t have access to natural sunlight, you can use LED grow lights.
- Rotate the bottles every few days to ensure even sunlight exposure.
Watering is equally important, but overwatering can harm the plant. The soil should remain slightly moist, not waterlogged.

Follow these tips for watering:
- Use a spray bottle to mist the soil gently.
- If you’re using a self-watering system, refill the bottom reservoir when it gets low.
- Avoid letting water collect on the surface of the soil.
Caring for the Growing Plants
Once the seedlings grow about 4–5 inches tall, you’ll notice several small leaves forming. This is when the plant begins to strengthen its roots and prepare for flowering.
To keep your plants healthy:
- Remove the weaker seedlings, keeping only one strong plant in each bottle.
- Insert a small stick or straw into the soil to support the growing stem.
- Remove any yellow or wilted leaves.
- Feed your plant every two weeks with organic fertilizer, compost tea, or diluted liquid manure.
You can also gently pinch the top leaves once the plant grows taller. This encourages the plant to grow bushier and produce more tomatoes.
Pollination and Flowering
After about a month, your cherry tomato plant will start to flower. These yellow blossoms will later turn into small tomatoes. But for that to happen, the flowers must be pollinated.
If you’re growing the plants outdoors, wind and insects will naturally pollinate the flowers. However, if you’re growing indoors, you may need to assist the process manually:
- Gently shake the plant every few days.
- Use a soft brush or cotton swab to transfer pollen from one flower to another.
Within a few weeks, you’ll notice tiny green tomatoes forming. Over time, they’ll change color to red, orange, or yellow depending on the variety.
Harvesting Juicy Cherry Tomatoes

After about 10–12 weeks from planting, your cherry tomatoes will be ready to harvest. You’ll know they’re ripe when they turn fully colored and firm to touch.
Follow these steps for harvesting:
- Pick the tomatoes gently by hand or use scissors to cut them off.
- Avoid pulling hard, as it may damage the branches.
- Store freshly picked tomatoes at room temperature for best flavor.
You can use these homegrown tomatoes in salads, pasta, sandwiches, or simply enjoy them fresh from the plant.
Reusing and Expanding Your Bottle Garden
After harvesting, you don’t have to throw away your bottle planter. With a little care, you can reuse it for the next crop.
Here’s how you can do it:
- Remove the old roots and leftover soil.
- Clean the bottle and refill it with fresh soil mix.
- Add new compost to restore nutrients.
- Plant new seeds and start again.
You can also expand your garden by adding more bottles. Try hanging them on a wall or arranging them vertically to create a mini “tomato wall.”
Some creative ideas include:
- Hanging bottles on a balcony railing using ropes.
- Painting bottles for a decorative touch.
- Using different sizes of bottles for variety.
This not only makes your garden look attractive but also helps recycle more plastic and save space.
Common Problems and Solutions
While growing cherry tomatoes in bottles is easy, a few problems may arise. Here’s how to handle them:
- Yellow leaves: Usually caused by overwatering or lack of nutrients. Reduce watering and feed compost.
- Pests (like aphids or whiteflies): Spray neem oil or soapy water on the leaves.
- Weak plants: Ensure they get enough sunlight and support.
- No fruits: Try hand pollination and add more organic fertilizer.
With regular care, most issues can be easily managed.
Benefits of Growing Cherry Tomatoes in Bottles
There are many reasons why growing cherry tomatoes in recycled bottles is becoming popular among home gardeners:
- Saves space and fits perfectly in apartments or balconies
- Reduces plastic waste and promotes sustainability
- Low cost and easy setup using household items
- Produces fresh, chemical-free tomatoes
- Teaches children about recycling and gardening
- Can be grown year-round with minimal effort
Apart from the practical benefits, there’s something deeply satisfying about nurturing a plant from seed to harvest and enjoying the fruits of your labor.
Final Thoughts
Growing juicy cherry tomatoes at home using recycled bottles is a wonderful way to combine creativity, sustainability, and healthy living. It doesn’t require much space or investment just enthusiasm and a bit of daily care. With each bottle you reuse, you not only grow your own food but also contribute to a cleaner environment.
Start saving your old plastic bottles, gather some soil, and plant your first seeds. In just a few weeks, you’ll see your tiny garden coming to life, filling your home with green leaves and vibrant red tomatoes. Each harvest will remind you that sustainable living can be simple, beautiful, and delicious.