
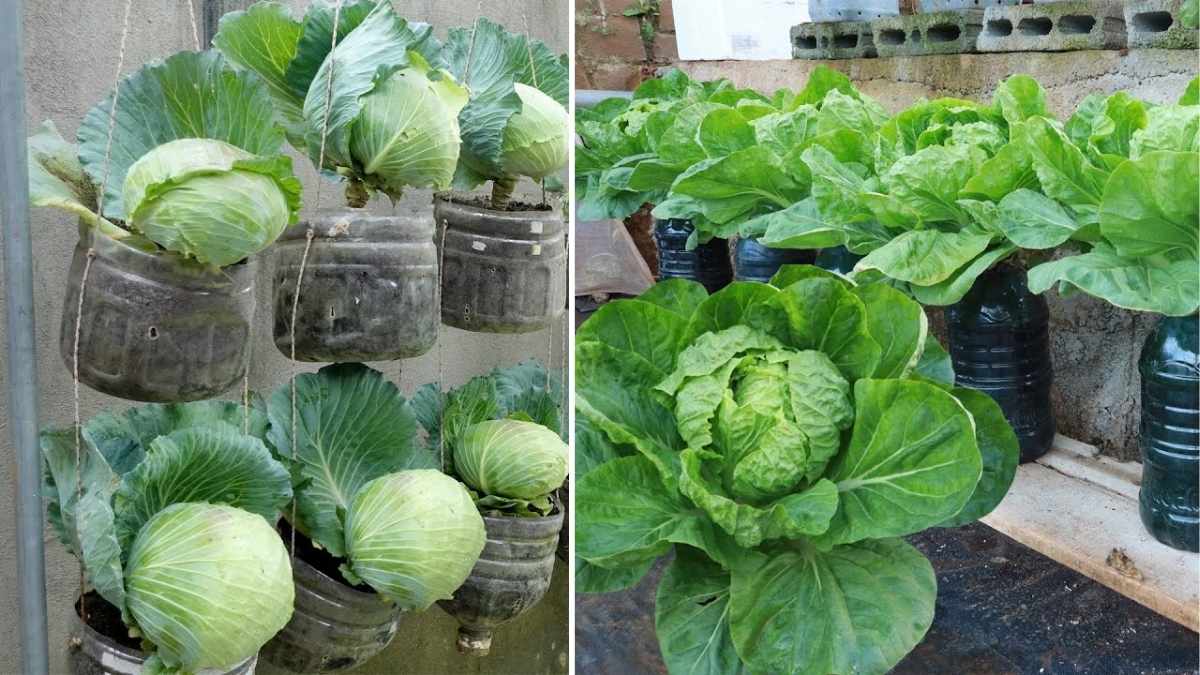
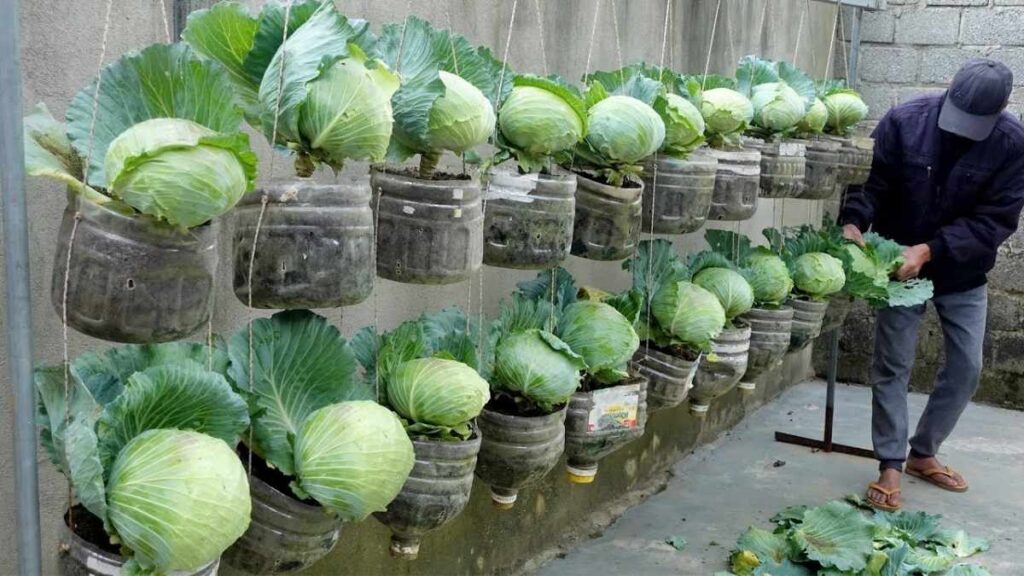
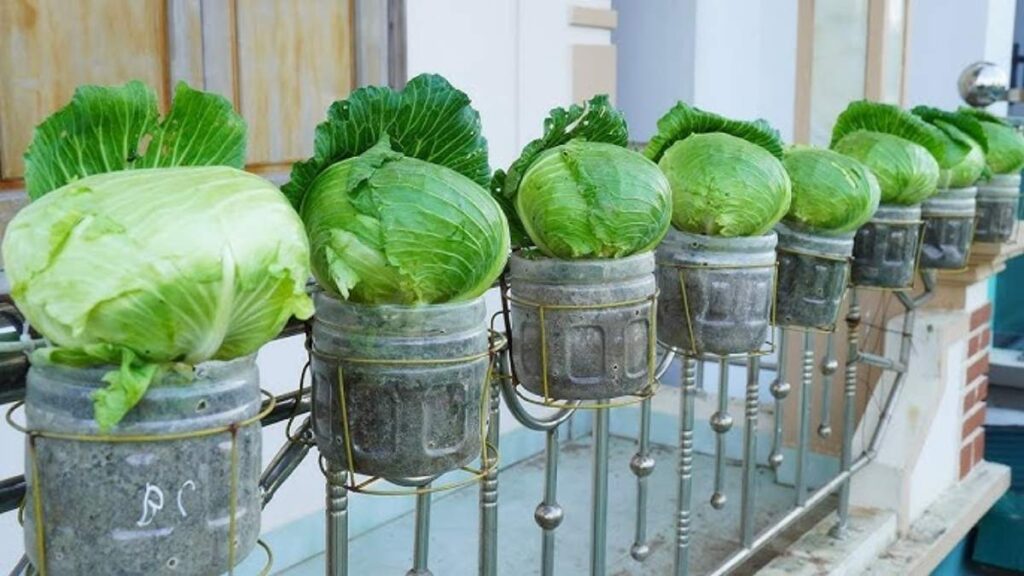
Growing a giant cabbage at home is a satisfying and rewarding endeavor. What makes it even better is the fact that you don’t need a large garden or expensive gardening tools. By using recycled plastic bottles, you can create a sustainable and space-saving growing system right at home. This method is particularly useful for those living in urban areas with limited space for gardening. It’s also an environmentally friendly way to repurpose plastic bottles that would otherwise contribute to waste. In this detailed guide, we will show you how to grow a giant cabbage using recycled plastic bottles in simple steps, with a focus on sustainability, cost-effectiveness, and space efficiency.
Why Use Plastic Bottles for Growing Cabbage?
Before we dive into the details of the process, it’s important to understand the advantages of using plastic bottles as your gardening containers. Here are several reasons why plastic bottles are a great option:
- Eco-friendly: Recycling plastic bottles reduces plastic waste, which helps protect the environment. By reusing bottles in your garden, you are contributing to sustainability.
- Space-saving: Plastic bottles are perfect for small spaces such as balconies, windowsills, and rooftops. They provide a compact yet effective solution for growing plants in urban settings.
- Affordable: Plastic bottles are inexpensive, and since they are usually available for free, they are a cost-effective way to start gardening without the need for expensive pots or containers.
- Controlled Environment: The plastic bottle provides a greenhouse-like effect, protecting your cabbage plants from pests and extreme weather conditions, allowing them to grow in a more controlled, nurturing environment.
Step 1: Choosing the Right Plastic Bottles
The first step in growing a giant cabbage is selecting the right plastic bottles. Here’s what to keep in mind:
- Size: Opt for bottles that are at least 2 liters or larger. The larger the bottle, the more space it provides for the cabbage’s roots to spread and grow. You can use 2-liter soda bottles, juice bottles, or even larger ones depending on the space you have available.
- Clear or Translucent: Choose clear or translucent bottles. The reason for this is that light needs to reach the roots for proper growth. Clear bottles allow light to penetrate, ensuring that the roots get enough light to thrive.
- Condition: Make sure the bottles are clean and free of any residues or harmful chemicals. Rinse them thoroughly before using them for planting.
Step 2: Preparing the Plastic Bottles

Once you have your plastic bottles ready, the next step is to prepare them for planting. Here’s how to do it:
- Cut the Bottles: Carefully cut the bottles in half horizontally using a sharp pair of scissors or a utility knife. Cutting the bottle creates two sections: one for the plant and one that can be used as a cover or lid. Alternatively, you can cut about one-third of the bottle from the top, leaving the remaining portion to create a mini greenhouse for the cabbage.
- Drainage Holes: One of the most crucial steps in container gardening is providing proper drainage. Use a sharp object (like a nail or a drill) to make small holes at the bottom of the bottle. These holes will allow excess water to drain, preventing the soil from becoming waterlogged, which could harm the cabbage roots.
- Optional Lid: If you want to create a more controlled environment, you can use the top portion of the bottle (the part with the neck) as a lid to help keep in moisture and heat, mimicking a mini greenhouse. Just make sure there is some airflow through small holes at the top.
Step 3: Filling the Bottle with Soil
The type of soil you use plays a significant role in how your cabbage will grow. Cabbages need rich, well-draining soil to thrive. Here’s how to prepare the soil:
- Soil Mix: Use a mixture of compost, peat moss, and perlite. This combination will provide a good balance of nutrients while ensuring that the soil drains well. Avoid heavy, clay-like soil, as it can retain too much water and lead to root rot.
- Filling the Bottle: Fill the bottom portion of the plastic bottle with soil, leaving about 2-3 inches of space at the top. Make sure to pack the soil lightly, but don’t compress it too much. Cabbages need air circulation around their roots, so leave enough space for the roots to breathe and expand as they grow.
Step 4: Planting the Cabbage Seeds or Seedlings
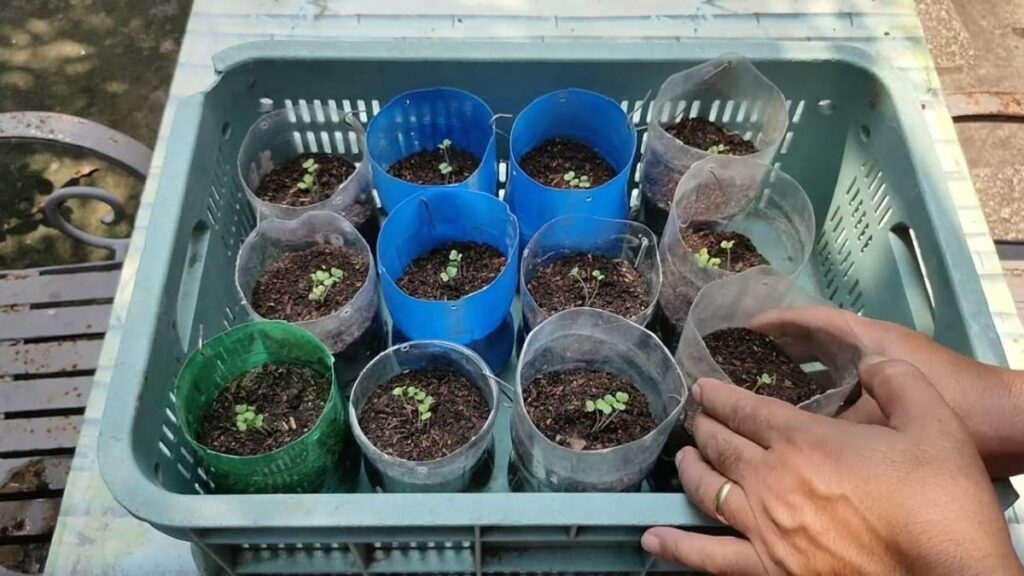
Now that your plastic bottles are filled with soil, it’s time to plant your cabbage. You can start from seeds or seedlings, depending on your preference.
- Planting Seeds: If you’re starting from seeds, make small holes in the soil about 1/4 inch deep. Plant 2-3 cabbage seeds in each hole to increase the likelihood of successful germination. Cover the seeds lightly with soil and gently water them.
- Planting Seedlings: If you prefer to skip the germination process, you can transplant young cabbage seedlings into the prepared bottles. Gently remove the seedlings from their original containers and place them in the center of the bottle, covering the roots with soil.
- Watering: After planting, water the soil thoroughly, but avoid overwatering. The soil should be moist, but not soaked.
Step 5: Providing the Right Care for Your Cabbage
Cabbages require specific care to grow into large, healthy plants. Here’s how to give them the best chance to thrive:

- Sunlight: Cabbages are sun-loving plants, and they require at least 6-8 hours of direct sunlight each day. If you’re growing them indoors or in a shaded area, consider using grow lights to ensure they get enough light.
- Watering: Keep the soil evenly moist but not waterlogged. Overwatering can lead to root rot, so make sure the plastic bottle’s drainage holes are functioning properly. Water when the top layer of the soil feels dry to the touch.
- Fertilizing: Cabbages are heavy feeders. Use an organic fertilizer or compost tea every 2-3 weeks to provide your plants with the nutrients they need to grow. A balanced fertilizer with equal amounts of nitrogen, phosphorus, and potassium will work well.
- Temperature: Cabbages grow best in cooler weather, ideally between 60°F and 70°F (15°C and 21°C). If the temperature is too high, your cabbage may not form a large head and could bolt (go to seed). If you live in a hot climate, try to shield your plants from direct afternoon sun or move them to a cooler area.
Step 6: Protecting Your Plants from Pests
Even though you are using recycled plastic bottles, pests can still find their way to your cabbage plants. Here’s how to protect them:
- Organic Pesticides: Use organic insecticidal soap to spray your cabbage leaves and stems to prevent pests such as aphids and caterpillars from infesting your plants.
- Diatomaceous Earth: Sprinkling diatomaceous earth around the base of your plants can help deter slugs and other crawling insects.
- Regular Inspections: Check your cabbage plants regularly for signs of pests, such as holes in the leaves or visible insects. The earlier you catch pest problems, the easier it will be to manage them.
Step 7: Supporting the Growing Cabbage
As your cabbage grows larger, it may need some extra support to keep it from toppling over:
- Staking: Use a bamboo stake or a small garden stake to provide support to the growing cabbage. Tie the plant gently to the stake using soft twine to help keep it upright.
- Pruning: Remove any yellowing or damaged leaves to promote better airflow and prevent diseases. This also allows the plant to direct more energy into producing a large, healthy cabbage head.
- Spacing: If you’re growing more than one cabbage, make sure the bottles are spaced far enough apart to avoid overcrowding. Each cabbage needs enough room to spread out.
Step 8: Harvesting Your Giant Cabbage
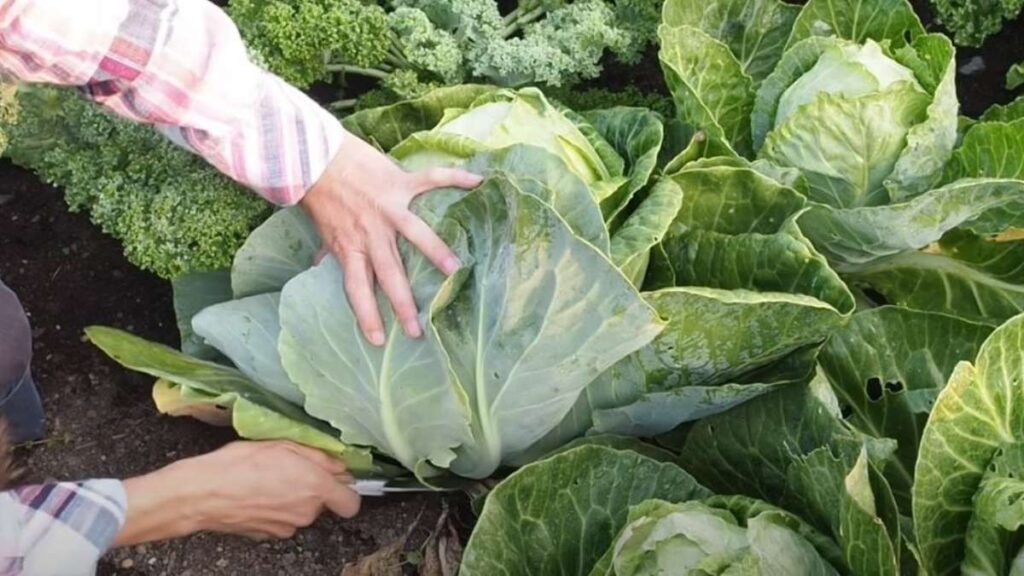
After months of care, your cabbage should be ready for harvest. Here’s how to know when it’s time:
- Mature Head: Cabbages are ready to harvest when the head is firm, dense, and fully formed. It should feel solid when you press on it with your hand.
- Cutting: Use a sharp knife or gardening shears to cut the cabbage at the base of the plant, leaving a few outer leaves to protect the roots. If you want to regrow cabbage, leave the roots intact, and you may see new growth in the coming weeks.
Troubleshooting Common Issues
- Yellow Leaves: If the leaves of your cabbage turn yellow, it could be a sign of a nutrient deficiency, most likely nitrogen. Apply a balanced fertilizer or compost to fix this issue.
- Leggy Growth: If your cabbage grows tall without forming a solid head, it could be a sign of insufficient sunlight. Move the bottles to a sunnier spot or use supplemental grow lights.
Conclusion
Growing a giant cabbage using recycled plastic bottles is an innovative and sustainable gardening technique that can yield impressive results. Not only does it help you create a space-efficient, eco-friendly garden, but it also allows you to grow your own fresh, organic food at home. By following the steps outlined in this guide, from selecting the right bottles to caring for your cabbage plants, you’ll be well on your way to harvesting your own homegrown giant cabbage in no time. Whether you’re a beginner or an experienced gardener, this simple yet effective method is sure to bring you success and