

Basil is one of the most popular herbs, known for its fragrant leaves and essential role in dishes like pesto, pasta, and salads. If you love cooking with fresh basil but want a continuous supply without the constant need to buy new plants, propagating basil at home is the perfect solution. This process is easy, cost-effective, and allows you to have an endless supply of fresh basil right in your kitchen or garden. Let’s dive into how you can propagate basil effectively and enjoy a never-ending harvest.
Why Propagate Basil at Home?
Propagating basil has several benefits. First, it helps you save money because you don’t need to buy new plants each time you want fresh basil. Second, it’s an environmentally friendly option because you’re reusing parts of the plant rather than purchasing more. Third, basil is relatively easy to propagate, making it a great herb for beginners and experienced gardeners alike.
What You Need to Get Started
Before you begin propagating basil, gather the following supplies:
- A healthy basil plant from which to take cuttings
- A pair of sharp scissors or pruning shears
- A glass of water or a small pot with soil
- A sunny spot in your home or garden
Step 1: Choose Healthy Basil Plants for Propagation
The first step in propagating basil is choosing a healthy plant. Look for a basil plant that has strong stems and lush green leaves. Avoid plants that have started to flower, as this indicates that the plant may be near the end of its life cycle and may not propagate well.
Select a few stems that are at least 4-6 inches long. These should be free from disease and pests, ensuring the new plants will be healthy.

Step 2: Cut the Basil Stems
Once you’ve selected the stems, it’s time to take your cuttings. Using your sharp scissors or pruning shears, cut the stem just below a leaf node (the spot where leaves grow from the stem). Make sure the cutting is long enough (about 4-6 inches) to allow for rooting. Removing a cutting from the top of the plant also encourages the plant to grow more branches, making your original basil plant bushier and fuller.
Step 3: Remove the Lower Leaves
After you’ve cut the basil stems, remove the lower leaves, leaving only a few sets of leaves at the top. This step is important because it prevents the leaves from rotting when submerged in water and also allows the plant to focus its energy on growing roots. Be gentle while removing the leaves to avoid damaging the stem.
Step 4: Rooting in Water
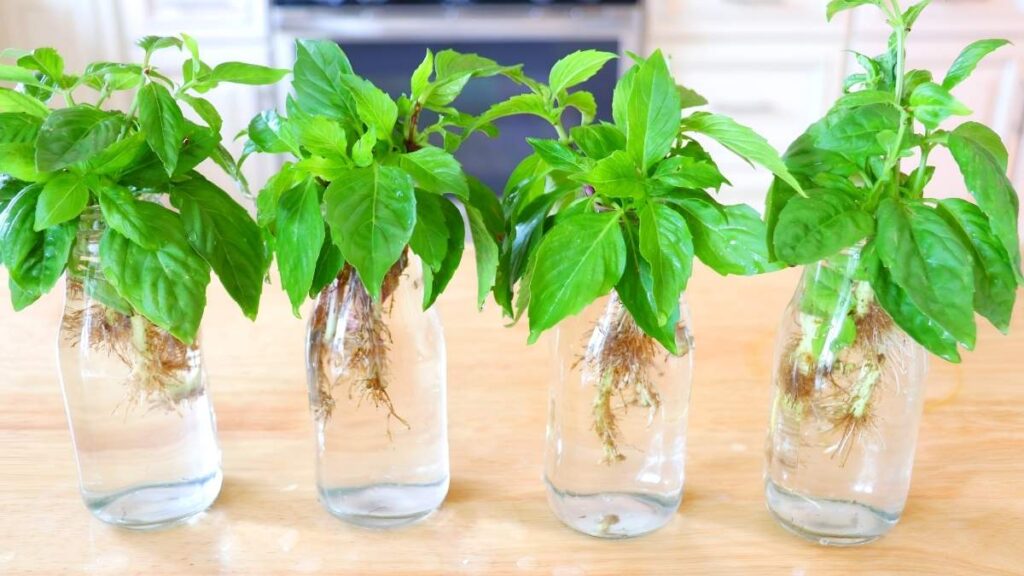
One of the easiest ways to propagate basil is by rooting the cuttings in water. Place your basil cutting in a glass of water, making sure that the leafless part of the stem is submerged, but the leaves stay above the waterline. Place the glass in a bright spot, but avoid direct sunlight, as this could cause the water to overheat and stress the plant.
Within a few days, you should start seeing small roots emerge from the bottom of the stem. It typically takes 1-2 weeks for the basil cuttings to develop enough roots to be transferred to soil, though this can vary depending on temperature and humidity.

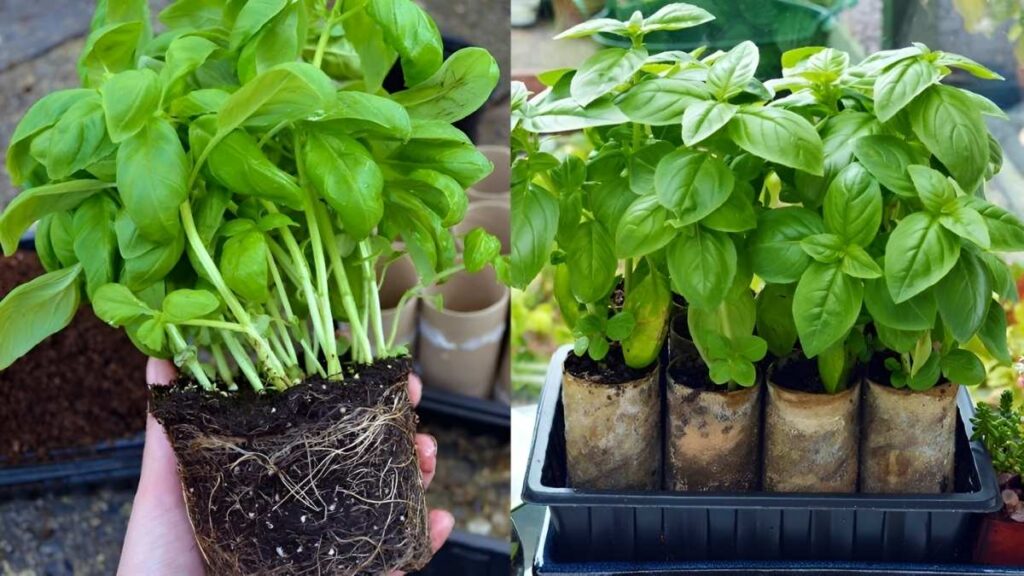
Step 5: Rooting in Soil
While rooting basil in water is common, you can also propagate basil directly in soil. To do this, prepare a small pot with well-draining potting mix. Make a small hole in the soil with your finger or a stick and gently insert the basil cutting into the hole. Pat the soil around the cutting to secure it in place.
Water the soil lightly, keeping it moist but not soggy. Basil cuttings root best in a warm, humid environment, so you may want to cover the pot with a clear plastic bag or place it in a propagation dome to maintain humidity. Check the cutting every few days, ensuring the soil remains moist, but not waterlogged.
Step 6: Transplanting the Basil Cuttings
Whether you rooted your basil cuttings in water or soil, once the roots are around 1-2 inches long, they’re ready for transplanting. If you propagated in water, simply transfer the cutting to a pot with soil. For those who propagated in soil, the cuttings can stay in their current pot until they grow large enough to be moved to a larger container or planted directly in the ground.
When transplanting your basil into the soil, choose a location with plenty of sunlight, as basil thrives in warm, sunny conditions. If you’re growing basil indoors, place it near a window where it can get at least 6-8 hours of indirect sunlight each day.
Step 7: Care for Your Newly Propagated Basil
Once your basil plant is established, it’s time to give it proper care. Water it regularly, but be careful not to overwater. Basil prefers soil that’s slightly dry between waterings. You should also fertilize your basil every couple of weeks using a balanced, all-purpose fertilizer to encourage healthy growth.

As your basil grows, pinch off the tops of the stems to encourage bushier growth. Regular harvesting is also important. By regularly cutting back the leaves, you prevent the basil from flowering too early and help the plant continue to produce new leaves for future harvests.
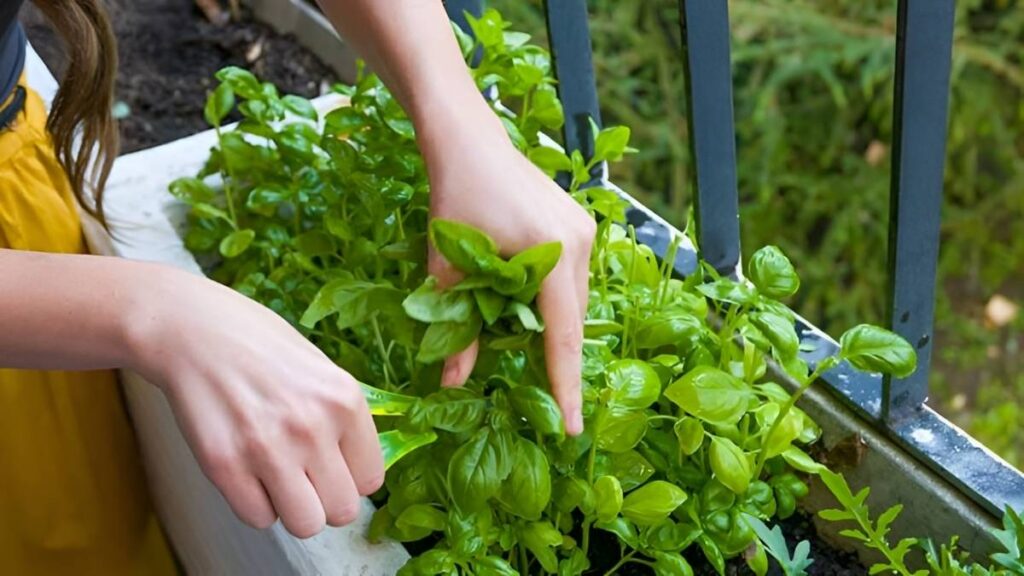
Step 8: Harvesting and Enjoying Fresh Basil
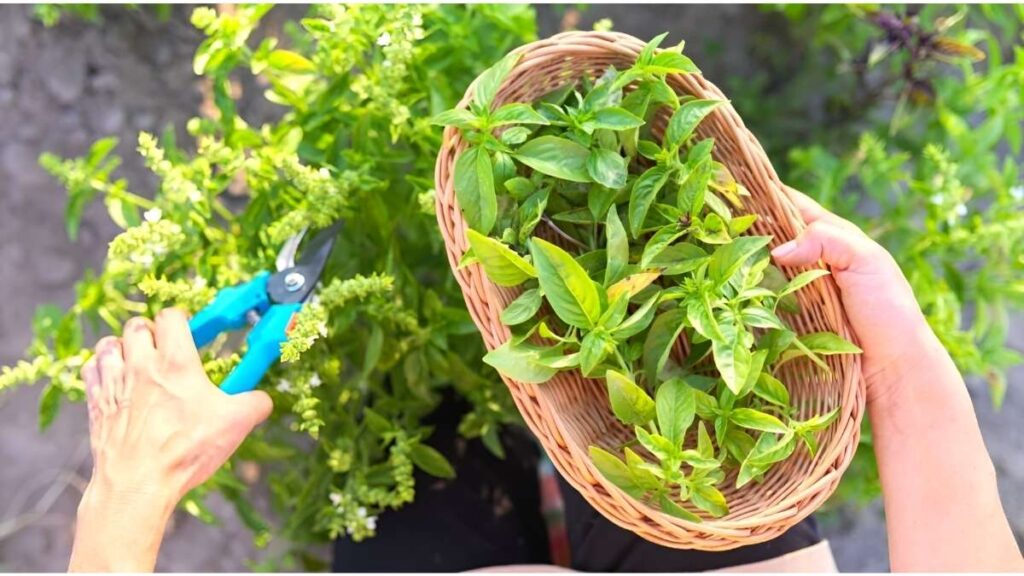
Basil is ready to harvest once the plant has grown large enough and has plenty of leaves. To harvest, simply pinch or cut the leaves from the top of the plant, ensuring that you leave some leaves behind to allow the plant to continue growing.
The more you harvest, the more your basil plant will grow, creating a cycle of endless fresh basil. By propagating basil regularly, you can ensure that you always have a healthy supply of this aromatic herb to use in your cooking.
Conclusion
Propagating basil at home is a simple and rewarding way to enjoy a never-ending supply of fresh herbs. Whether you choose to propagate by rooting in water or soil, the process is straightforward and doesn’t require much effort. With a little care and attention, you can grow a steady supply of basil right in your own home or garden. By following these steps, you’ll have fresh basil whenever you need it, making your cooking more flavorful and your garden more bountiful.